N5ESE's Portable Solar Charger
(click on any picture to see larger version)
...more pix below...
(click on any picture to see larger version)
...more pix below...
| NOTE: 'N5FC' is my former call. This project was constructed while that call was valid, and you may observe references to it. |
Here's a neat little project that uses both your ham and carpentry homebrewing skills. (No jokes about my woodworking, now...)
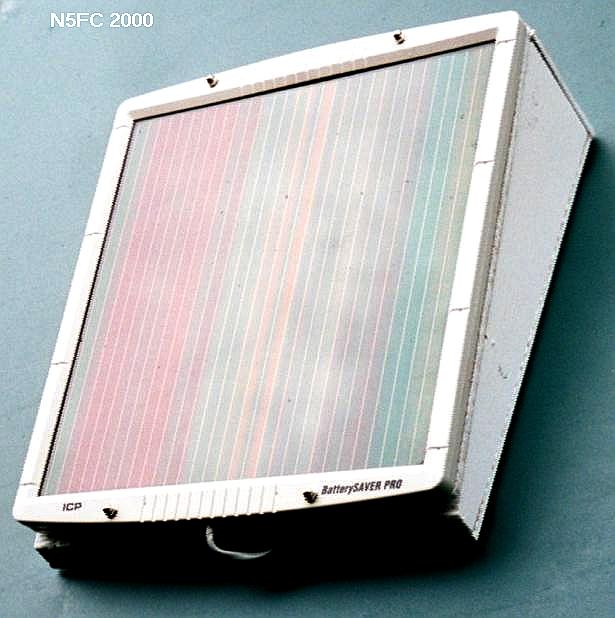
About a year ago, I bought a 5 Watt solar panel on sale at Harbor Freight. It's an ICP Battery Saver Pro, and will supply about 15 Volts DC at 335 mA in full sunlight, which is about perfect for the 7 AH batteries I usually use for QRP portable. For a while, I just lashed-up some battery clips and wire, laid the solar panel on a lawn chair, and used a voltmeter to check the progress of the charging. I soon tired of hauling around all the piece-parts, and decided to consolidate battery, metering, and panel into a single enclosure. The result is what you see here, a 15" x 15" wood box about 5" high. This is not rocket-science, folks, so I'm not going to give dimensioned drawings, but I'll present the pictures with a description of what's going on, and you can duplicate it on your own from that point.

In the picture above, you can see what I'm trying to accomplish. I wanted to be able to store the battery and wiring inside the box, and hinge the top of the box so that it opens. The top of the box holds the solar panel, which can be propped at any convenient angle to maximize the solar collection (and so, the charging current). The box was built from 1x4" pine boards and 1/4" thick particle board. Cheap, real cheap...
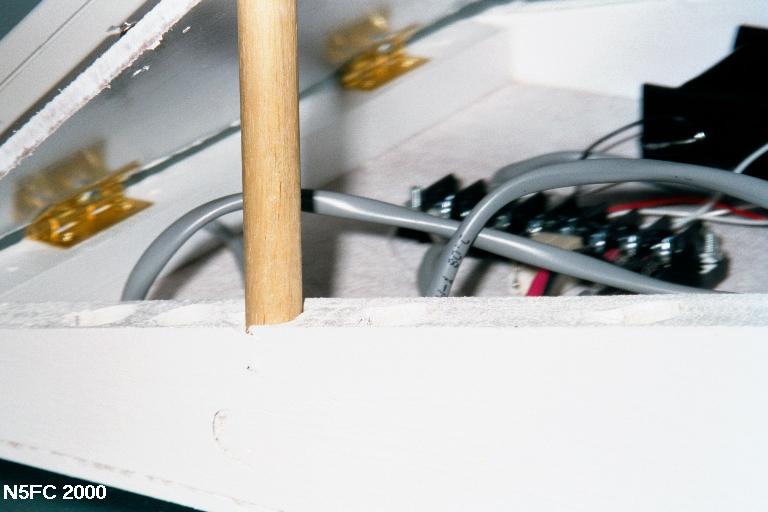
The next picture (above) is a close-up of the method we use to prop the panel at the desired angle. I used two 1/2" dowels, about 3-1/2" long, one on each side of the solar panel. The sides of the box were then drilled at intervals, so that I could insert the dowels wherever I wanted along the side, to effect the desired angle. It works pretty well, and if I want the box closed (or near-flat), I just throw the two dowels inside the box, and the door-panel (solar-panel) serves as the top cover.
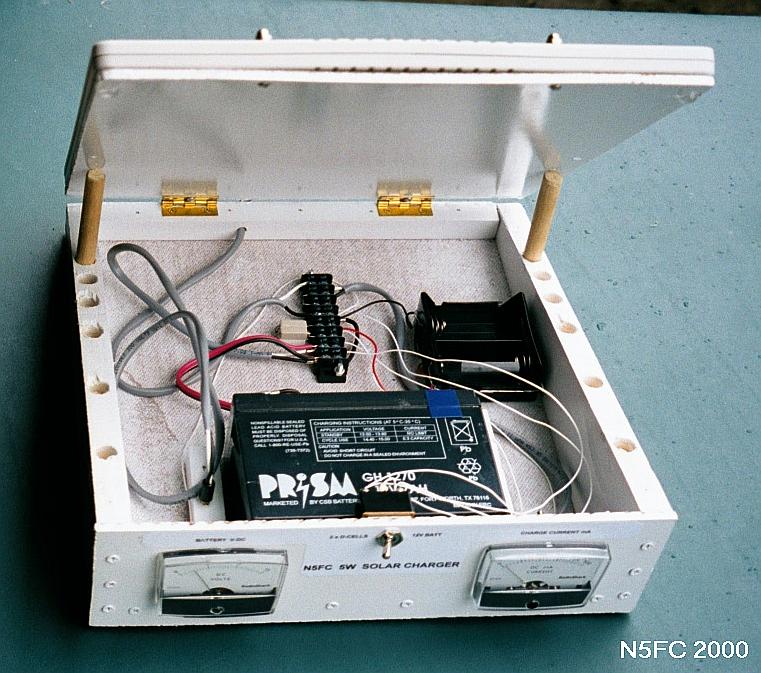
This image (above) shows the guts of the unit, and needs a little explanation. First, you'll see the 7AH, 12V battery. It connects with 1/4" quick-connect terminals, and can be swapped out readily (I keep 3 batteries standing by at all times). A little 1x1" wooden barrier keeps the battery from sliding around during transportation. Barrier strips were selected as tie-points for all wiring, in an attempt to keep things neat. Both current and voltage are monitored; current so I can verify charging is taking place, and voltage so I can see when to stop charging (around 14.4 volts maximum for a gell-cell lead-acid battery). I just used Radio Shack meters. I also installed a switch, and some circuitry for charging 2 NiCad D-Cells (the 4500 mAH type, which I use in my QRP battery booster accessory). The switch selects which battery is actively being charged (the lead-acid or the NiCad D-cells). This picture also clearly shows the hinges and holes for the propping dowels.
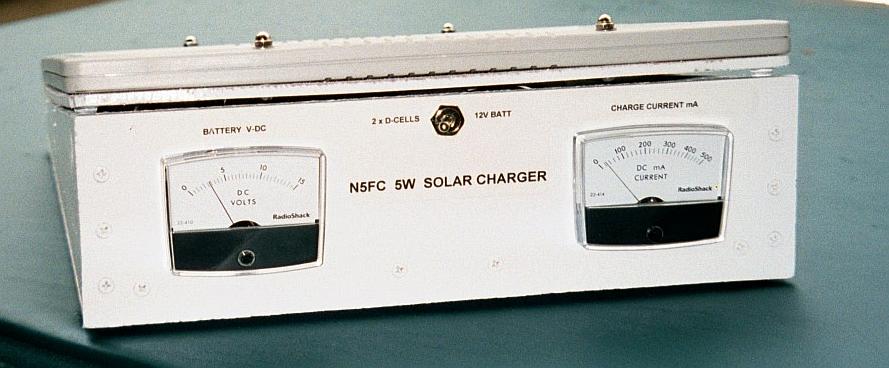
Here we see the front panel. The left meter reads the battery voltage, and the right reads charging current. The center switch selects which of the batteries is currently in the circuit. In this case, we see that the NiCad D-cells are in the circuit, that the voltage applied is about 2.5 volts, and the charging current is about 25 mA (from ambient indoor light)
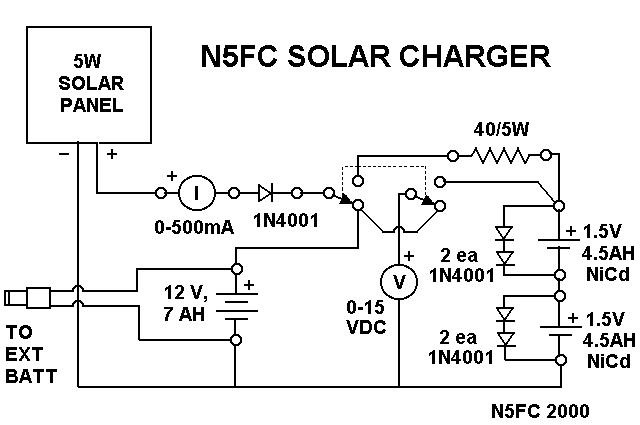
Finally, here's a schematic of the electrical hook-up. The circuitry for charging batteries is unregulated, and depends on the operator to disconnect the battery before it gets overcharged. The circuitry for the NiCads is an especially crude regulator, but it keeps the batteries from over-charging. Here, two series silicon rectifiers limit the voltage to about 1.3- 1.4 Volts (1.43 Volts is about ideal for a NiCad to terminate charge), A planned improvement is to add real regulators so that over-charging cannot occur. A 14 Volt fixed-voltage-regulator would be ideal for the lead-acid battery, and maybe something a little more sophisticated for the NiCads.
Using this setup, I've found that I can charge a mostly-discharged 7-AH gell-cell in about 3 days of Texas sun. The NiCads take about 1-2 days.
Hope this gives y'all some ideas!
73,
Monty N5ESE
dit dididit dit